Apillon Recipe #1: A Web3 alternative to WeTransfer
The first episode of cooking Web3 with Apillon shows you how to store and share files on a decentralized network privately.
The first episode of cooking Web3 with Apillon shows you how to store and share files on a decentralized network privately and without the risk of third-party impact.
- Why a Web3 alternative to WeTransfer?
- Storing files on IPFS via Crust
- Step 1: Create a storage bucket
- Step 2: Upload any file
- Step 3: Share the link
- Step 4: Make it editable
Why a Web3 alternative to WeTransfer?
First, to avoid any misunderstanding — WeTransfer is a fantastic tool, and we’re all used to using it, so this post does not mean to degrade it in any shape or form.
But we’re also all for applying the Web3 approach where it seems appropriate. And private file sharing could definitely use some upgrades in terms of accessibility and security risk.
So, here’s why a Web3 alternative to WeTransfer (or other similar Web2 platforms):
- Files pinned on IPFS are stored on a decentralized network, not in a centralized silo.
- A decentralized architecture of storing file replicas mitigates third-party attacks or invasion.
- Your files remain accessible for as long as the link is valid and do not depend on a third-party cloud storage provider that could become inaccessible due to downtime or censorship.
Storing files on IPFS via Crust
The Apillon platform allows you to store files of any kind on a decentralized network and share them via a simple link — leading not to the platform where contents still require download to be viewed but directly to the file(s) in question.
Apillon’s Web3 Storage service implements the technology of Crust Network, a Polkadot parachain that pins files to IPFS nodes around the globe.
And it’s all doable without having to know the first thing about coding or Web3, simply by dragging and dropping, copying and pasting.
🔎 Learn more about Apillon’s Web3 Storage service. 👇

Ok. Let’s dive right in.
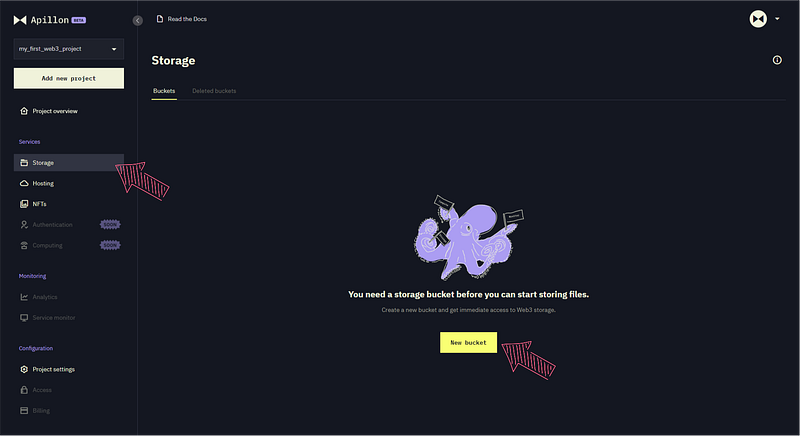
Step 1: Create a storage bucket
Register or log in to the Apillon dashboard. In the menu on the left, navigate to Storage and create a new storage bucket by clicking on the yellow button.
🔎 Learn more about Storage bucket.
In the pop-up, enter your bucket name to easily distinguish it from other-purpose decentralized storage buckets. Add a description, too, and click “Create bucket & continue to management”.
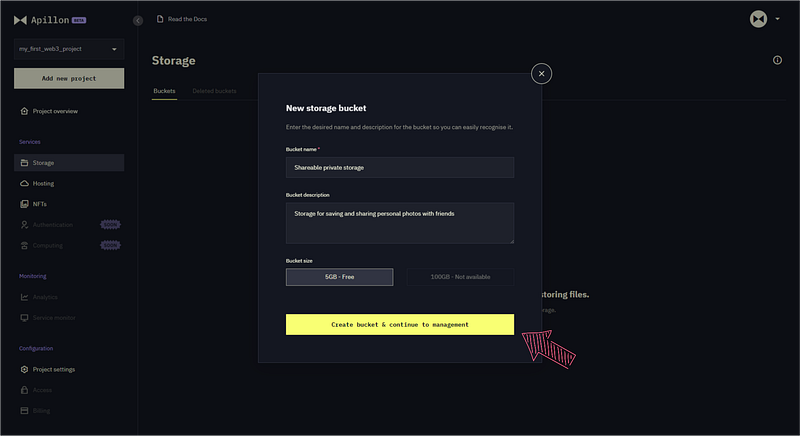
🔎 Note: With Apillon, you can store up to 5 GB of files on a decentralized network for free — much more than with other decentralized storage providers. In future versions, the platform will allow you to upload and store even more, up to 100 GB of files, on IPFS.
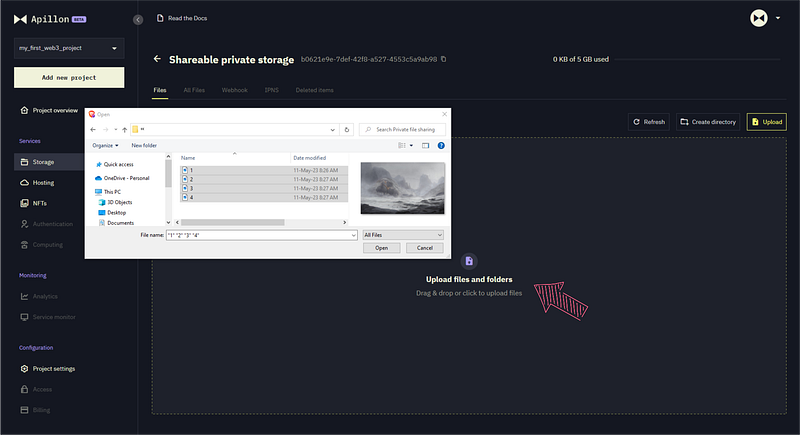
Step 2: Upload any file
Now, it’s time to bring your files to the platform and pin them on IPFS via Crust Network.
You can upload the files:
2.1 Upload one by one
On the dashboard, click “Upload files and folders”, and in the local drive, select the files you wish to upload and share via a decentralized network.
Review the chosen selection and, if all is good, click “Upload now”. If you wish to remove any file, simply click the X icon.

Shortly after, you should see them successfully uploaded and listed in your storage bucket.

At this point, the files are being pinned on IPFS via Crust and replicated on dozens of nodes around the globe, which could take a minute or two.

Once the pinning is done, each file gets its own CID (content identifier) and a link leading to its IPFS-pinned version.

Instead of uploading files individually, you could also move multiple at once into a designated folder. 👇
2.2 Upload files in bulk
To upload multiple files in one go, click “Upload files and folders” and choose the files you wish to upload from your local disk.
Now, in the uploaded files list, click “Wrap in directory” and then “Upload now”. This will upload files in a separate folder for you to share the containing files in bulk.
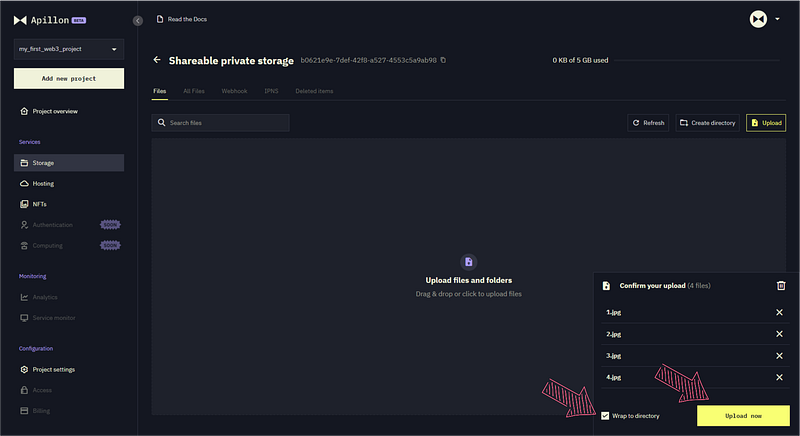
Next, in the pop-up window, enter the folder name and click “Upload”.

Soon after, the directory should appear on the list of uploaded items. Once all containing files are uploaded and get their own IPFS link, the directory itself also gets pinned on IPFS via Crust — its CID and Download link are listed next to the folder name.

Step 3: Share the link
Now, the Download link that points to your file or folder on IPFS is what matters — double-check its contents before you share it.


If you click on it or copy and paste it into a new browser tab, you get either:
- The file itself (under individual file links)
- The folder contents (under directory links)
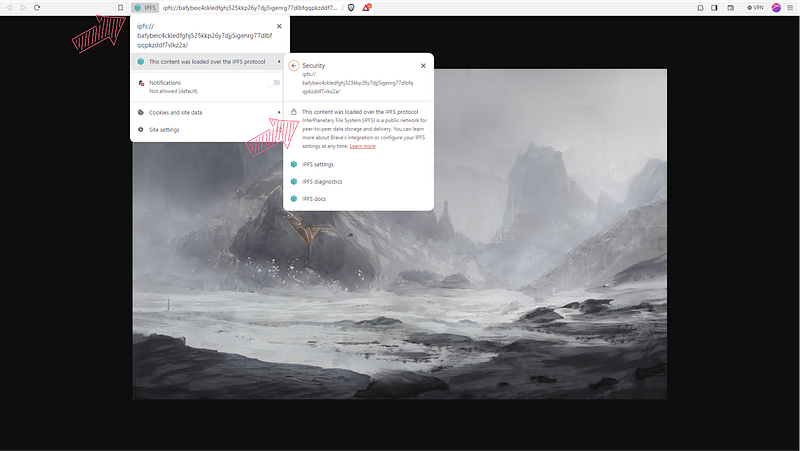
Some browsers, like Web3-powered Brave, offer you a way to redirect to IPFS either manually by clicking on the icon in the right corner of the URL field, or automatically if enabled in your Brave browser settings.
Notice how the URL changes from the apillon.io domain to the IPFS-pinned link as you’re redirected to the IPFS network.


The file’s status of being pinned to IPFS (plus other details) can also be observed in Brave if you click on the IPFS icon in the left corner.
The same goes for folders/directories pinned on IPFS.
Click your directory’s Download link on the Apillon dashboard to open an index of files stored under it in a new browser tab.
If you click the IPFS icon in the right corner of the URL field, you’re redirected from the apillon.io-originated URL to the IPFS-based URL — notice how they change.

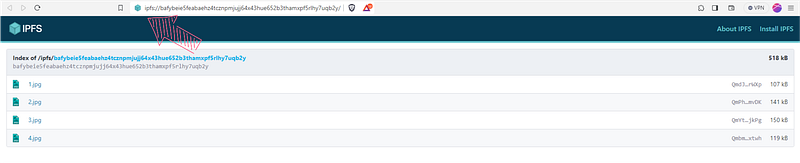
The listed items link to their respective IPFS-pinned files. This is also visible when you click the IPFS icon in the left corner. Click on a listed file to open it in your browser.

Notice how the IPFS-based URL of the file that was uploaded individually differs from the one linking to the file that was uploaded in bulk with others in a separate directory.
Now, if your link points to the right content, feel free to share it with your friends, family or colleagues. Your file(s) will be accessible in a direct way, bypassing third-party cloud storage platforms.
🔎 Note: The IPFS-based links generated via Apillon can be used for 6 months. For that same period, anyone with the link can access the files you share with them in a decentralized way.
Step 4: Make it editable
If the files you upload and share need to remain editable, for example, spreadsheets or documents, publish them to IPNS, as well.
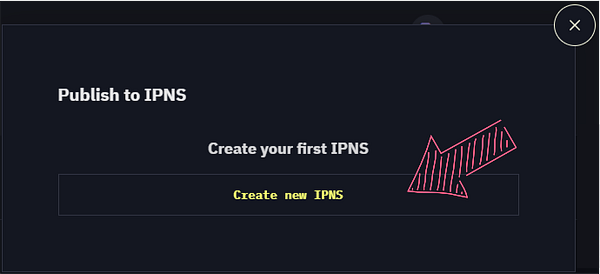
Under three dots next to a file or folder, click Publish to IPNS.
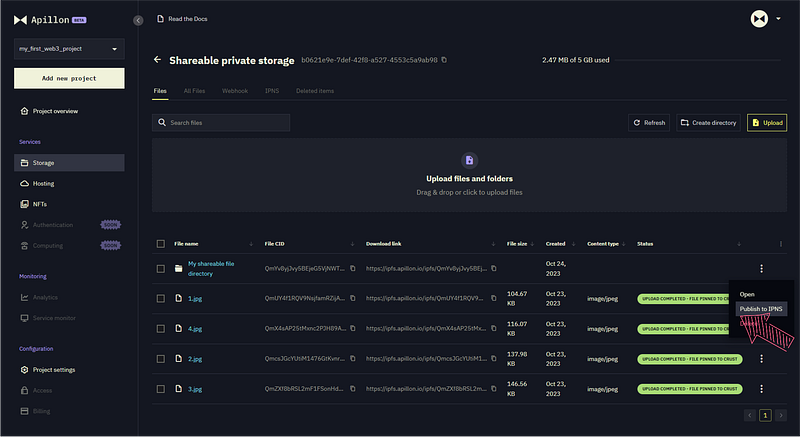
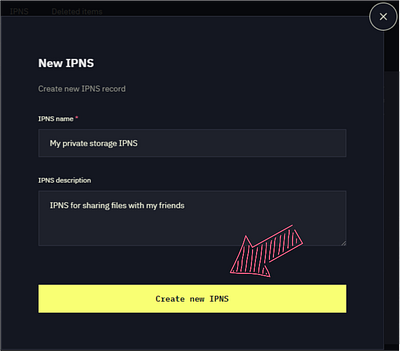
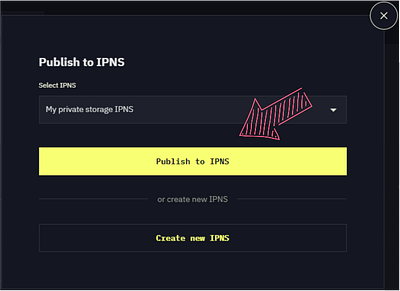
In the first pop-up window, click “Create new IPNS”, and in another one, enter the name and description of your new IPNS record. Lastly, choose the newly created IPNS record on the drop-down list and click “Publish to IPNS”.
When uploading to IPNS is done, you can find it under the IPNS tab.

Clicking on the IPNS link takes you to the editable register under the IPFS-based URL.

With IPNS, your file or folder acquires a mutable pointer to its CID (content identifier). This link can be updated while still pointing to the same content or file under it.
🔎 Learn more about IPNS. 👇
This is how you can store and share your files in a truly decentralized fashion without relying on third-party cloud storage platforms. Or, if you feel like taking it a step further, you could integrate the same flow into your custom-built UI and create a proper Web3 file sharing platform for others to use, too.
The process should take you no more than a few minutes, so start today and contribute to the adoption of Web3 storage using photos of your cat or doodles you created during the last video meeting.

Want more?
Keep the momentum going. Explore more posts for sharp insights, real tips, and Web3 stories that might just spark your next big idea:

⧓ About Apillon
The Apillon platform serves as a unified gateway to the Web3 services provided by linked Polkadot parachains. Following the multi-chain vision, Apillon powers the transition of developers to Web3, simplifying its adoption in the real economy, and expanding its versatility as the ecosystem grows. With Apillon, Web3 services are within reach for every developer, regardless of their background and experience with blockchain technology.
Website | Wiki | GitHub | Twitter | Telegram | LinkedIn | Reddit